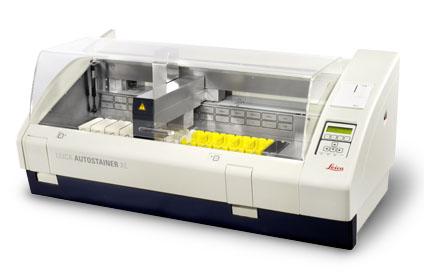
Congratulations on purchasing a new autostainer! There are three parts to the start-up process: Instrument Verification, Stain Protocol Optimization, and Validation of the Staining Protocols.
Instrument Verification – see CAP All Common Checklist (06/04/2020) COM.40350
Optimally, the company you purchase the instrument from should provide an operator manual; provide verbal procedural instructions; and test the stainer to verify its proper operation. You should also be provided signed documentation confirming that it operates as intended.
If you are in a large hospital system, the Clinical Engineering department will do a safety, operational, and functional inspection. Obtain a copy of the Clinical Engineering records showing their approval of the instrument and include these documents with the other papers you are putting together for the Verification and Validation.
Stain Protocol Optimization
Prior to staining patient tissue, you will need to test the staining protocol(s) to make certain that the stain quality that the new instrument is providing is acceptable for diagnosis. This needs to be done even if the staining protocol is the same one as used on the old instrument – they are different machines, and will operate differently, thus requiring an independent optimization.
To verify what an acceptable H&E stain looks like, look at the photos in reputable Histotechnology reference books such as Carson, Bancroft and Brown. To improve your knowledge, read the differences between reference-quality H&E staining versus poor quality staining. If you ever found yourself in a legal predicament you really don’t have the excuse to say, “well, this is what my pathologist likes”. Consider what could happen if your lab was sued based on the quality of your work and your employer had to go to court. The prosecuting attorneys would show text book quality photos, as established by ASCP, NSH and/or HistoQIP (proficiency standard for US laboratories) to support their case. In turn, your employer would need to show high quality photos as evidence to win its case.
With this ideal in mind, do some test runs with several different types of tissues. Use tissues that you process frequently, such as breast, skin, GI biopsy, and placenta. Use tissues that are sensitive to the stain expressions of the eosin and hematoxylin chemicals, such as small and large intestine.
To assess the staining quality of eosin you may want to use epithelial, muscle and lymphoid tissue to better visualize nuclei. Use muscle, collagen, epithelial cells, and mucin cells to better visualize connective tissue. Use eosinophils and plasma cells to better visualize various WBCs.
To document your results, you need to design an H&E Stain Optimization Worksheet. Start with a grid that lists all the elements of the protocol that are being used on your H&E stainer.
Document the following details on the H&E Stain Optimization worksheet:
- Name of solution/reagent in each container
- Time that slides spend in each container
- Temperature, if appropriate, e.g., running water
- pH of appropriate solutions, e.g., water, hematoxylin, eosin, acid rinse
- Date and test run number
- Signature of the Tech that oversaw the run
- Signature of the Pathologist that assessed the results
Next, have a section on the optimization worksheet where you record your results. Some example questions might be:
Overall Stain Quality (observed using a 10x objective):
- Is the staining even?
- Are the nuclei standing out darker than the background?
- Is there an absence of splotches, e.g., water droplets?
Hematoxylin Staining (observed using a 40x objective):
- Is the nuclear wall dark and crisp?
- Is the chromatin pattern stippled, not smudgy?
- Is the nucleolus, if present, a red to purple color?
- Are other cells (plasma cells and pancreatic acinar cells) which are expected to stain bluish, doing so?
- Are the mucin cells clear of color (often seen as a pale blue color if you are using a Gill hematoxylin and/or are not doing a regressive stain)?
- Are the muscle and connective tissue cells free from a bluish color?
Eosin Staining (observed using a 40x objective):
- Are RBCs the darkest red?
- Are eosinophil granules, Paneth cell granules, and zymogen granules as dark, or nearly as dark, as RBCs. Note, if you are using a fixative with acetic acid, these organelles will be lysed and this question does not apply.
- Is muscle tissue a medium shade of pink, and is collagen a light shade of pink?
- Can muscle be differentiated from collagen? Observing medium size blood vessels should show this differentiation.
If the results are not satisfactory, follow up to find out what is causing the problem. Then make changes to the H&E protocol, run another rack of test slides, and then record the results. Continue doing this until you finally get good quality H&E staining. This is now your optimized H&E Stain Protocol.
Now, you are required to do a control run every day, which can tell you when you need to rotate or change solutions/reagents. Or, you may want to do a control run every 200 or 400 slides.
Validation of the Staining Protocol
Before the stainer is used for any patient slides, you should validate the staining program(s).
According to the new CAP standards which were published in June 2020, Validation of the staining protocols is no longer required! COM.40350 – see NOTE 8: “This checklist requirement (validation) does not apply to LDTs that employ the following methods: Manual microscopy (eg, histopathologic and cytologic interpretation, microscopic examination of blood or body fluids, Gram stains)”
HOWEVER, all US labs are licensed by CLIA, and CLIA does require stain protocol validation. You could still be inspected by a CLIA inspector even if you are CAP accredited, and if you did not do validations you would be cited.
Each different H&E program must be separately validated. This means that if you use one program with more delicate staining for your biopsies, and a different program for routine surgical specimens, both staining programs must be separately validated. To do this, stain 20 different slides of differing common tissue types according to your optimized protocol. Twenty is the commonly accepted number of test runs for most laboratory validations.
Design your Staining Protocol Validation Worksheet with the following details:
- A header that includes the make, model, and serial number of the instrument.
- The body to record the following information:
- Accession/ID number for the 20 slides
- Tissue type
- Review approval/non-approval
- Comments
- A footer with the following information:
- A statement which says: “This protocol has been validated and is approved for patient use”.
- A signature sign-off for the Medical Director and the date
- The lab name and address
You are required to keep the records of the Instrument Verification and the Staining Protocol Validations for the years you own the instrument plus two years. Optimization records are not required to be archived.
Re-validation of the instrument is required if:
- The staining protocols are changed
- The solutions/reagents are changed
- The instrument is moved to a different location, within or outside of your lab
- The instrument has had any major repairs
References:
- Peggy A. Wenk, BA, BS, HTL(ASCP)SLS, Former Program Director, Beaumont School of Histotechnology
- Beth A. Cox, HTL/SCT(ASCP)QIHC, 11/09/2020
- Robert G. Rankin, MSM, SM(ASCP), 11/09/2020
- CAP All Common Checklist COM.40350, 06.04.2020